2. Walkthrough
2.4. Part 3: "The Showdown " (1)
><><><><><><><><><><><|
Part 3: "The Showdown"|
><><><><><><><><><><><|
Well, now that the power's back on, continue directly to the left to access...A
Navigation room!? In the middle of nowhere!? Ah well, might as well get your
new mission.
^^^^^^^^^^^
MISSION 13:
"Green Thumb?"
^^^^^^^^^^^
STORYLINE: Simply put, the power's not back on. 'Auxiliary power' only powers
Save and Recharge Rooms, so we can use those, but all doors are still inactive.
We'd better get going and restore the REAL power source!
Now, go out the left exit, open the gate and go through the left exit again,
and you'll be back in the big room with all the overgrowth we saw earlier. Drop
to the bottom right to save your game, then go to the left side of the room.
Space Jump up the left side until you spot some overgrowth blocking a Morph
Ball tunnel and use a combination of beam shots to clear it away and Space
Jumps to keep you up. Roll through that tunnel, and lay a Power Bomb to rid the
passage of more overgrowth. Roll through to the left...
~~~~~~~~~~~~~~~~~~~~
Sector 2, TRO(pical)
~~~~~~~~~~~~~~~~~~~~
Once you enter this room, you'll hear the SA-X music, but you won't be able to
see it. There's no other route out of this place other than the bottom left
exit, and the SA-X is blocking it. You'll have to make your way past it AND
reveal yourself to it (not an easy task.) So, drop down through the Crumble
Blocks, and as soon as you land, ready your Missiles, and fire one at the SA-X
one it notices you to freeze it for about one second. Run towards it, freeze it
again, then jump over it. Turn around, freeze it, and run through the bottom
left exit. Immediately lay a Power Bomb in this room, morph out, and shoot Ice
Missiles towards the entrance. As soon as you see the 'freeze' graphic, rush to
the left exit. In the next room, shoot the lamps to open the gates and run to
the left exit again. Jump up, roll through and drop behind the wall in this
room to hide from the SA-X. It'll soon leave. Pretty tough, eh?
From here, go out the right door. Pump some Missiles into the floor three
spaces to the right of the left door and drop down. Exit through the bottom
left door. In this room, jump up to the first ledge (avoid the bees, as they
can take away as much as a full tank of damage in one hit!) Blast away the
vines, then shoot down at the blocks near the left wall, drop down to the
bottom left door and go through. Go through the left door here. In this rather
large room, Space Jump up to the top until a you see a two space-wide wall and
a lay a Power Bomb in midair. You'll break away a whole bunch of blocks and
kill a whole bunch of enemies at the same time. Go to the right and grab the
***POWER BOMB TANK*** (5/32, 20.) Now, go through the top right door to save
your game. Run through the right door directly across from your entrance, and
as soon as you enter the next room, shoot up at the collapsible blocks above
you. Space Jump up to the top of the ledge and use your beam to clear away the
vines (kill any bees that are freed.) Go to the right, shoot the vines at the
top, and Space Jump up to the Boss Door. Destroy it and go through. You'll drop
down to a boss battle...
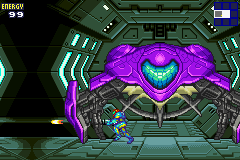
---------------
BIG BOSS BATTLE|
VETTORI-X |
---------------
As with Arachni-X, I changed this boss' name a bit. It's actual name is
Nettori-X. However, I found that 'Vettori' rolled off the tongue better...eh,
enough nerdy quibbles, all Vettori-X is is a Torizo surrounded by vines.
As soon as you drop down, jump up onto the ledge closest to the Torizo (the big
yellow thing to the right.) Try not to get hit into the energy-sucking flowers,
as it can be extremely difficult to get out of them before your energy is
substantially or even completely depleted. Now, when you're on that ledge close
to the Torizo, fire Missiles non-stop into it to cause damage. You'll see the
vines gradually break off as you inflict more and more hurt on it. I suggest
you crouch while you shoot. Whenever one of the floating spores gets close, go
into ball form and lay a Power Bomb to clear all the spores away, then keep
firing at the Torizo until another spore gets close, and lay another Power
Bomb, etc.
Eventually, all of the vines will break off and the Torizo will ditch its head.
At this point, it will fire Plasma Beams rapidly at your platform. The key to
this form is just to keep firing Missiles. If it's about to fire high, duck and
keep firing Missiles. If it's about to fire low, jump and keep firing Missiles.
Whatever it does, just keep firing Missiles at that Torizo!
After about 30 more Missiles, the Torizo will FINALLY be killed and an Eye-X
will appear in its place. You know the drill (wait for the eye to appear, fire
a Missile into it, repeat.) Four Missiles will break the Eye-X's shell, at
which point you can grab the ***PLASMA BEAM*** it leaves behind.
----------------|
MISSION COMPLETE|
----------------|
Go out the door on the far right. In the vertical shaft, try out your Plasma
Beam on the bees. They die twice as fast, and your shots are MUCH closer
together with this beam! Even better, they pass right through every enemy and
hit the ones behind them! SWEET! Now, out the door on the bottom left, and
continue back to the Save Room. Save your game (I don't need to actually tell
you that, do I?) First, go out the door to the right and Space Jump all the way
to the top right door of the shaft and go through. Jump up against the right
wall and you'll grab a ledge. Roll through and lay a Power Bomb in the secret
room. Grab the ***ENERGY TANK*** (12/20) that appears. Now, return to the Save
Room, go out the left door and go through the bottom left door in the big room.
You'll be in the long vertical shaft we first saw in Mission 3. Space Jump up
the shaft and go through the first door on the left (it'll have an insect
skeleton in front of it, but insects don't have skeletons...weird. You also
have to go into ball form to get to it.) In this room, get onto the rungs at
the top and go to the very left rung. Freeze the brown enemy when it passes
under you. Then go a little to the right and aim your gun diagonally down. Your
Missile shot should just barely clear the block it passes by. Freeze the other
brown enemy when it lines up with your shot, then go into ball form and use the
two brown enemies as platforms to get to the ledge on the right. Grab the
***POWER BOMB TANK*** (6/32, 22.) After grabbing the tank, you will immediately
drop through a Crumble Block. Once you land, lay another Power Bomb and you'll fall into another ***POWER BOMB TANK*** (7/32, 24.) Go up and out of this room
and back to the vertical shaft to the right of the Save Room you used earlier.
Go up to the top left door and go through. After you go through this corridor,
go into ball form and lay a Power Bomb in the next room. Drop down and proceed
to the Navigation room.
Adam, despite all the things you've done, has nothing but bad news for you.
Massive damage has been inflicted to Sector 5. You've got to hurry over
there...up the elevator!
|