2. Walkthrough
2.3. Part 2: "Old Friends " (2)
----------------|
MISSION COMPLETE|
----------------|
Now, go back out to the left and to the Navigation room...what's that? We
locked ourselves in AGAIN? Ugh...then go right into the vertical shaft and drop
aaaaaaaall the way down, then go through the bottom left door. In this room,
drop a Power Bomb (go into ball form, hold R and press B) and drop down through
the hold that appears. Go through the bottom left door. In this room, the music
will change...IT'S THE SA-X! OH NO! Quick, climb over that wall to the left!
Now, go into ball form, jump up against the left wall and lay a few bombs
(DON'T LAY A POWER BOMB UNLESS YOU WANT THE SA-X TO NOTICE YOU) and a secret
passage will open. Roll through and head over into the far left door. In this
next room, lay a Power Bomb and collect the ***POWER BOMB TANK*** (1/32, 12),
then use the rungs to climb up to the next level. Once on top of the ledge, lay
another Power Bomb and use the rungs that appear at the top of the room to
climb up. Freeze the brown enemies with your Missiles and use them as platforms
to reach the top of the shaft, then go through the top right door. Collect the
***POWER BOMB TANK*** inside (2/32, 14.) Now, go back out into the vertical
shaft and drop down to the middle left door and head in. Go to the top of this
next vertical shaft (you've been in it before), and in the next room, shoot up
at the collapsible block and lay a Power Bomb near the green-orange pillar. Go
through the now-accessible door to the left. In this nest room, roll through
the small ball tunnels, then freeze the brown enemies when they get close and use them to get over the two pits of Crumble Blocks. Before you drop off the
ledge to the tank, get out of ball form and do a spin jump to the left. You'll
just barely clear another set of Crumble Blocks, allowing you to grab the
***POWER BOMB TANK*** (3/32, 16.) Now, backtrack to the Navigation room to get
a new mission...
^^^^^^^^^^^
MISSION 11:
"It's Him!"
^^^^^^^^^^^
STORYLINE: Return to your ship. That's it. Really.
Go up the elevator...
~~~~~~~~~~
Main Deck
~~~~~~~~~~
Go up the Main Elevator, then continue to the right. Continue back to
your-what's that? The Main Elevator's stuck? Ouch. Lay a Power Bomb and roll
through the passage to the left to get out of here. Go through the right exit
of this simplistic room, and then morph into a ball and jump into the hidden
passage in the right wall...HOLY BEJEEZUS IT'S RIDLEY! OH! MY! GOD! AAAAAAAAH!
...err...and then he collapses. And a Core-X pops out of him. Bust. Drop down
the passage that appears underneath his remains...as soon as you drop down into
the next room, lay a Power Bomb and roll through the hidden passage in the left
wall. Once you reach the end of the passage, lay another Power Bomb and collect
the ***POWER BOMB TANK*** (4/32, 18) that appears. Go back out of this passage
to the right. Once you see a large group of goo-dropping enemies in the
ceiling, lay two Power Bombs to clear them away, then back up to the edge of
the ledge to the left and break into a Speed Boost to the right. You'll break
through a whole bunch of Speed Booster blocks. Lay another Power Bomb once you
boost through all the blocks and grab the ***MISSILE TANK*** (36/48, 190.)
that's revealed. Now, shoot at the grey blocks at the top of this passage, jump
up, and continue right back to your ship. Save your game once you're beamed up
into it.
----------------|
MISSION COMPLETE|
----------------|
Another mission will immediately begin...
^^^^^^^^^^^
MISSION 12:
"Power Outage!"
^^^^^^^^^^^
STORYLINE: The power is out...we've got to head over to the Reactor Silo and
activate the auxiliary power system. I wonder what caused the outage...? And
wouldn't you know it, the Etecoons and Dachoras are safe and sound aboard your
ship! Yay!
Once you get out of your ship, go left until you reach the first vertical
shaft. Lay a Power Bomb in here and enter the hidden passage at the bottom
left. Shoot the blocks in the bottom right corner of this room, then drop down
and proceed through the bottom right door. In this room, shoot away some of
the overgrowth at the top of the room with your beam, then use it as a bridge
to get to the top right. Shoot down through the overgrowth here and drop down
to the door directly below. Go through. In the next room, use charged shots or
Missiles to vanquish the Pirates. Go to the right and grab the ***ENERGY
TANK*** (11/20.) Go through the exit to the right. In this next room, shoot
away a block in the far right floor, then drop down. Go to the far left and
shoot away a block in the floor there, then drop down so you're just above the
tank. Lay a Power Bomb, then get out of the alcove above the tank and shoot
away a block in the far right floor there, then drop down and kill yet another
Pirate. Shoot away the block in the far left WALL here (didn't see that one
coming, eh?), roll through and grab the ***MISSILE TANK*** (37/48, 195.) Shoot
a block in the floor just to the right of the tunnel entrance (where you got
the tank), drop down and kill ANOTHER Pirate. Far right floor. Shoot block in
floor. Drop down. Shoot a block in the floor five spaces to the right of the
left wall, roll through, and drop down. Once you drop down, lay a bomb and roll
through to the left. Climb to the top of the rungs and shoot your beam to the
right to break another block. Roll into the tunnel, and four spaces from the end of the tunnel, lay a bomb, jump up, ad destroy the Boss Door. In we go...
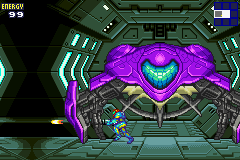
---------------
BIG BOSS BATTLE|
ARACHNI-X |
---------------
I am perfectly aware that this boss' official name is Yakuza-X. However, I hate
that name. So I'll call it Arachni-X instead, okay? (Don't confuse this boss
with the first one of the game, Arachnus-X.) This is definitely one of the
hardest battles in the game...
After a few seconds, three flames will shoot down from the top of the room, and
a gigantic spider will appear, shuffling diagonally towards the bottom. DON'T
HIT IT, or massive damage will be inflicted upon you. (You CAN shake out of its
grab, however, by mashing the buttons as fast as possible.) Every now and then,
when Arachni stops at the top of the room, it will open up its mouth. That's
your cue to fire Missiles as rapidly as possible directly up into it. After a
few seconds, it'll shoot three flames down at you. The middle one is guaranteed
to hit you, unless you were a sissy and ran out of the way after two Missile
shots. This flame's damage is dwarfed by the power of the grab attack, so don't
worry about it. All you've got to worry about is avoiding that grab. Roll into
a ball in the corner and it can't get you (but the flames can.)
After about 15 Missiles, Arachni will lose its legs and Space Jump around the
room. After each 'bob', it will spew out a piece of garbage, which you can
destroy with your beam. While it's spewing out the garbage, you have to shoot a
Missile into its open mouth. It can be quite tricky to hit it from an angle, so
I suggest you just follow Arachni around while it Space Jumps and shoot a
Missile directly up every time it opens up. Beware, though: sometimes Arachni
will try to 'ram' you into the floor by simply NOT Space Jumping for a few
seconds. Watch out for these attacks, and keep shooting Missiles into its
mouth. 15 more Missiles will turn it into a Core-X. Six Missiles will break the
shell, at which point you can recover your ***SPACE JUMP*** ability.
To properly Space Jump, you must remember: only hit the A button to 'bob' again
when Samus is beginning to fall to gain maximum height. You cannot Space Jump
while Samus is still traveling upwards; remember that also. Using these tips,
Space Jump all the way into the secret passage at the top left of this room. Go
through and hit the switch in the next room to activate auxiliary power.
----------------|
MISSION COMPLETE|
----------------| |