6. Walkthrough
27. Border Forest
Items: Dark Fruit, Forest Disc, Dark Tattoo, Zombie Killer, Sleep Rod, Life
Source, Wild Berry, Earth Sap, Hell Scythe
Suggested Levels: 18
Now there should be a new area available on the world map. It's on the east
continent. Go there, and select the only place available. You'll be at a dock.
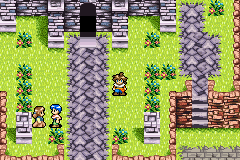
Go west to next screen, and enter the building. Look at how the cleric is
blocking the way to the closet. Now go out and west to enter the forest.
Just follow the path to next screen. You'll see a ghost, follow him south to
next screen. Here, you'll see him again. Cut the 4 grasses south to get a Dark
Fruit, and continue south to next screen. Here, you realize it's always the
same screen again and again, so instead go north to previous screen. This time
there are monsters. Go east to next screen. Here, you'll meet the priest from
the dock's building. If he's here, he can't block the way, no? Go back to the
docks and inside the building. Open the closet to get some Holy Water.
Now make your way back to the priest and talk to him. He says to go to the
graves and banish the spirit. So whip across, follow the path, open the chest
to get a Forest Disc. Now go south all the way to reach a chest with a Dark
Tattoo. Go back north a bit, and go east, up the cliff, north across the acid
pond (walk in the grass so you wont take any damage), and continue to next
screen. Here, walk all the way on the rock path, whip south, whip south again,
whip east, fall down, go east, north, east, south, up and get the Zombie Killer
from the chest. Now go back to the rock path, whip your way to where you fell
down, and instead of falling whip east. Whip north and continue to next screen.
Now, after this acid bath, it would not be a bad idea to heal. Go east and
watch the scene of the ghost vanishing in front of the tomb. Walk to the tomb
and use the Holy Water. This will make the spirit appear.
* Boss: Demon Steed *
HP: 1050
EXP: 9800
GOLD: 3800
SUGGESTED LEVELS: 19
I strongly advise using Rami for this fight, so toss anyone else. Usually a
monster or Torma. First, know he takes little to no damage from ice, but water
seems to hit him pretty bad. If you want, go for Level2 spells, they hit more
but cost a lot more. Now for your 3 other guys, have them attack. Draining his
DEF with Rami could not be bad. Beware of his Cinder Slash, it can hurt bad.
Try to always keep you HP high
****************************************
Now that he is dead, the curse on this forest is gone. Go back to where it kept
looping. There, go south and you'll reach the place where you looped. Follow
the path south and FINALLY you'll reach a new area.
Here, take the left path, and burn the stump you will see to the left. Go up
the vines west, go west and burn the other stump. This will make 3 monsters
appear. Kill them, and continue west to get a Sleep Rod. Now head back east to
where you burnt the first stump, and continue south. You'll see a pole and a
log blocking the way, so continue southeast. Follow the path until you come to
2 stumps. Burn them to get a Life Source. Continue west a little, and when you
have the choice of going west or north, go west and follow the path to get a
Wild Berry. Go back to the junction, and go north, then east. Whip south over
the log and get an Earth Sap. Bash the pole you just whipped on, and whip back
north. This time go northwest until you reach next screen.
Here, you'll notice the music is different. It's that gratzean militaristic
theme. Go west, burn the 4 stumps to find an Hell Scythe. Go north and the
guards will shoot at you, refusing to let you pass. Dekar wants to bash in, but
Rami decides to sneak instead. Now go north (heh, I thought they would
shoot...) and west near the castle's wall. The screen will fade, and you will
see through some trees. Follow the path through and, when you come out, go west
to reach Gondarle.
28. Gondarle
Items: Dried Meat, Moldy Bread x3
Everyone here are ghosts, restless because of Gratze's actions. The inside of
building is rather strange too. It's as if Gratze took the time to kill every
single table and bed and make it a ghost. Anyway, enter the first house you
see, and go to the right of the bed. Break the jar to get some Dried Meat. Now
continue going left and enter the next house. Open the closet to get a Moldy
Bread. The guy here sells weapons/armors. Make sure you buy the Restrain Chain
for Torma since he doesn't have any Zircon stuff. You may also want to get the
Silk Toga and Holy CAP for Rami and Gold Bracelets for everyone, but don't buy
anything else, there's better stuff in Narvick.
West of this house is the inn, go inside and open the closet for another Moldy
Bread. North of the inn is the items shop, enter it from the left and open the
closet to get yet another Moldy Bread. East of the items shop is the church.
Now go north between the items shop and the church to reach the graveyard. Fall
in the hole to reach the Land of the Dead.
29. Land of the Dead
Items: Killer Armor, Charred Newt x2, Revive, Life Source, Antidote, Dark
Chains, Dark Armor x2, Magic Jar, Clothes, Moldy Bread x2, Magical Bikini,
Rotten Meat x2, Dark Crystal, Mind Sources x2, Demon Helm, Tail Ring
Suggested Levels: 19
Go west and through the door. Go north and light the 2 candlesticks. Proceed
north to next room. Follow the path (don't go in the acid) and head north to
next room. Fall down anywhere and get the Killer Armor near the coffin. The
armor is cursed, so don't equip it, even if the DFP is good. The curse is
pretty bad, you take 100 damage when its your turn, no matter what you do.
Beware, as walking on some places may release skeletons. Go south and up the
ladder. Break the 3 jars to get 2x Charred Newt and a Revive. Go north to get
back to the room you fell. Back here, light all 5 candlesticks and proceed
through the opening north. Head north and break the jars in the northeast
corner to get a Life Source. Proceed west through the wall to next room.
Go west and break the 3 jars to get an Antidote and Dark Chains. Head north and
break the cracked wall with Bau's hammer. Head through to next room. Here, walk
to the door. It's the Storage Room. Break the jars to get a Dark Armor. Head
back west, push the left crate up twice, bash the barrel, push the crate over
it up twice, bash the barrel and go upstairs.
Here, there's a lot of doors, but most are locked. Go north and up the stairs,
west, and enter the westmost door. Break the lone jar to the left to get some
Clothes. Head back out and this time go east and south to enter the southeast
door. Break the jars to get a Magic Jar. Head back and enter the eastmost door.
Open the closet to get a Room Key. This key opens the second level's center
door (just west of where you are). Go in front of the door and use the key. The
door will unlock. Proceed through.
Here you'll see a ghost searching for her pendant. Read the diary on the table
and leave. Head down the stairs and the door will mysteriously open. Don't
complain and go in. Head through the first door north. Break the 5 jars to the
left to get a Moldy Bread and a Magical Bikini. Read the diary on the table.
Head out, go west and north to next room. Follow the path to get outside.
Follow the one-way path until you can get in. Break every jars and one of them
will hold the Mirror Key.
Go back to the previous building and back to previous room. Go south and west
and enter the door. Break the 3 jars north to get a Rotten Meat. Break the
other one to the right to get a Moldy Bread. Head north through the door.
You'll be locked inside. Go north and break the 8 jars to get a Rotten Meat.
Now, to continue, you need to kill all enemies in this room. This may take some
time. When they're all dead, proceed north to next room. Go north and up the
stairs. Read the diary. Head to the southwest corner of the room, break the jar
and get the Dark Crystal. Head back down the stairs, south to next room, south
again, and yet another time south.
Now head east and enter the eastmost door. Go east, south, west until you reach
4 jars, break them to get 2 Mind Sources. Now get out of this room from where
you entered, go west and south to get back to the main hallway. Go up the
stairs, west and south and unlock the southwest door. As it said, it's the
Mirror Room. Watch the scene, fight, head west and read the diary on the table,
south and break the jars to get a Dark Armor, and continue through the broken
mirror. Go west (watch out, you can fall down) and you'll reach a pillar. Whip
the other side and break the pots to get a Demon Helm (cursed). Fall down the
rightmost hole to get to a room filled with jars. Break them all to get a
Soldier Shield, which is actually a Special Item. Push the crate south and get
out of this room. Go north, down the stairs and west to find a statue without
any shield. Go in front of it, use the shield in proceed in.
Go west, break the jar and get the Storage Key. Explore the room and read the
diary on the dining table. Southeast is a Tail Ring in a jar. Now exit the
room. Go east and go down the stairs from where you first entered this place.
Bash the barrel, push the crate south, go east and unlock the door. Here,
navigate through until you reach the closet protected by 2 barrels, break them
and open the closet to get the Memorial Pendant. Exit this room and go back to
the main hallway. Go up the stairs and into the central door. Heal, and use the
pendant on the bed to fight...
* Boss: Girl's Spirit *
HP: 1580
EXP: 10000
GOLD: 4400
SUGGESTED LEVELS: 19
Have Rami take anyone's place and drain her DFP 2-3 times, then switch her for
a 4th fighter, as her magic is less powerful than the fighters attacks. Her
Black Storm spell hits everyone and causes 30-40 damage, so be prepared. So
does her Haunting spell. If you followed my advice and got Eldin and Torma the
Heal spell, use it to heal, or else you'll need to get Rami to heal. She can
also attempt to poison everyone, which can be pretty dangerous, as you'll loose
around 10HP per round. Having someone who knows Heal Plus is almost critical
for this fight. I had a pretty hard time killing her at lvl19 but it is
possible.
****************************************
After the fight, you will see "her love" coming back to her. She'll hand a
shard, though Eldin doesn't seems too happy to "Acquire the White Shard".
You'll end up outside, the mansion gone...
Now go south to get back to the city. There's nothing left here, except dogs.
However, by cutting all the grass around, you can find 9x 10G. Also, there's a
rat by a tombstone which is an Alchemist. Saving at the church would not be a
bad idea either. Now go in any other town and rest at an inn. |